Quick Answer
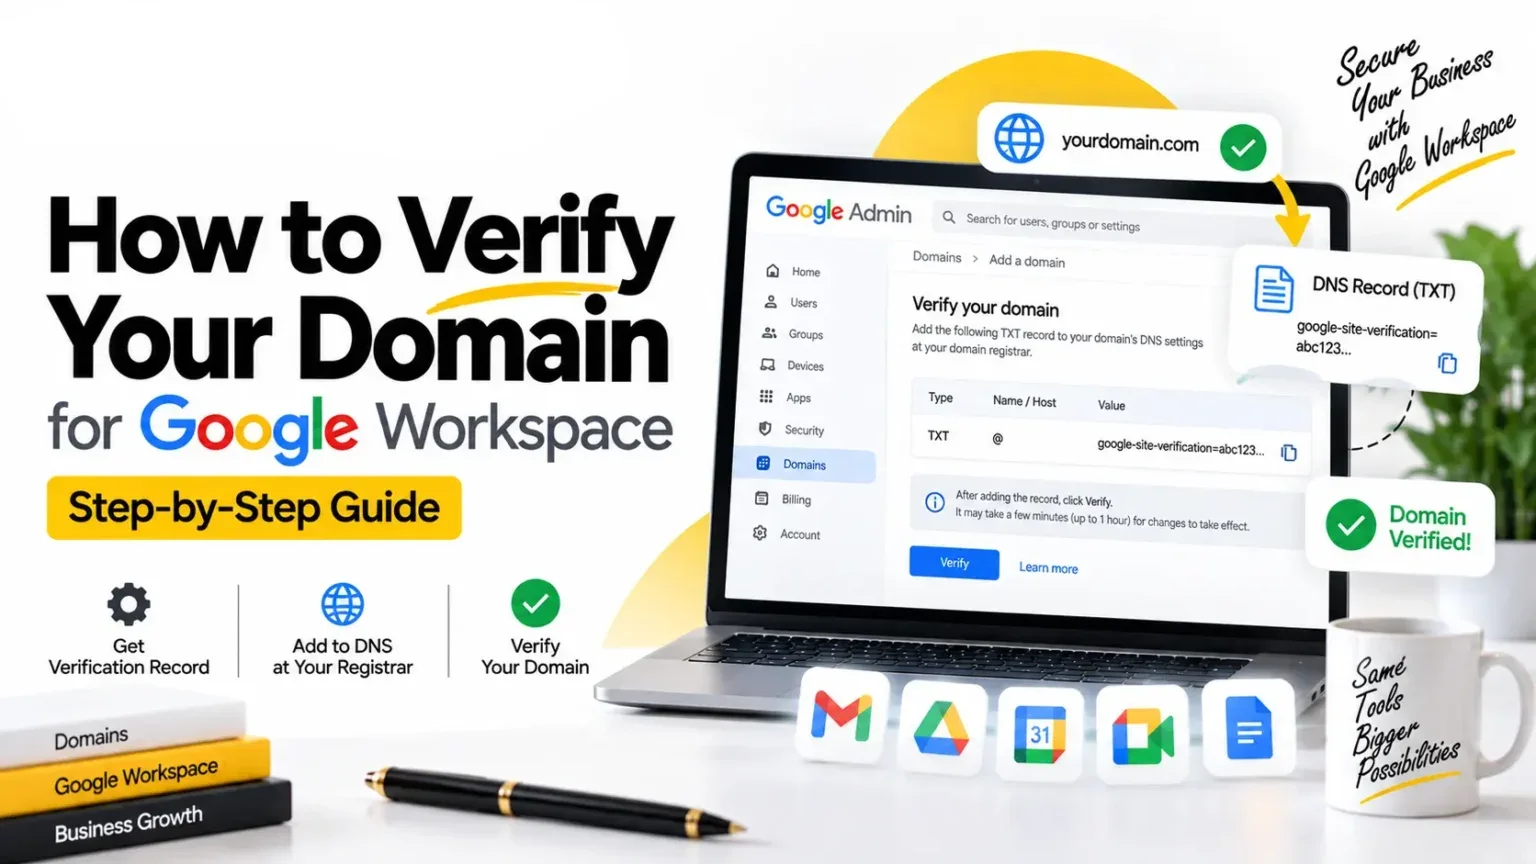
Verifying your domain for Google Workspace comes down to three steps: copy a unique TXT record value from the Google Admin console, paste it into your domain registrar’s DNS settings, then confirm ownership back in Google Workspace. Google says it can take up to 72 hours to recognize the change, but in practice it’s often much faster, sometimes just a few minutes.
The process is nearly identical no matter which registrar you use, GoDaddy, Namecheap, Squarespace, Hostinger, Cloudflare, or anything else. This guide walks through the general process step by step, plus the specific things that trip people up along the way.
The Three-Step Process, at a Glance
Before diving into details, here’s the whole thing in outline form, since it helps to see the shape of it before working through each piece:
- Get your unique TXT record value from the Google Admin console.
- Add that value as a TXT record in your domain’s DNS settings, wherever your domain is registered.
- Go back to Google Workspace and confirm, letting Google check that the record is live.
That’s genuinely the entire process. Everything below is either more detail on these three steps or handling specific situations that come up along the way.
Step 1: Get Your Verification TXT Record From Google
If you recently signed up for Google Workspace, you’ll likely see a notification prompting you to verify your domain right on your dashboard. If not, navigate there manually:
- In the Google Admin console, go to Account, then Domains, then Manage domains.
- Find your domain and click Verify domain.
- Click Get started, then select your domain registrar from the list if it’s shown, or choose My domain uses a different host if it isn’t.
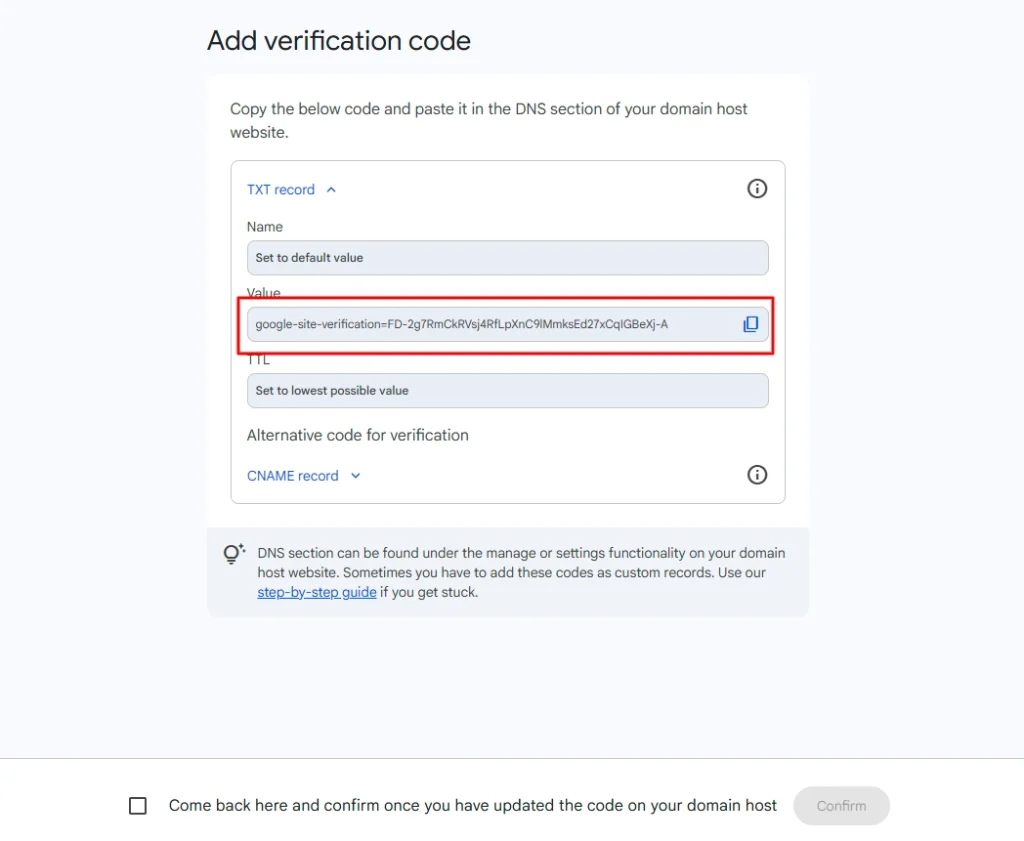
- In the TXT record section, copy the full value, including the
google-site-verification=prefix. Copy the whole string exactly, a partial copy is one of the most common reasons verification fails later.
One thing worth knowing: if you bought your domain through a Google partner at signup, it might already be verified automatically, skipping this whole process entirely. Check your domain’s status before assuming you need to do any of this.
Step 2: Add the TXT Record at Your Registrar
This step looks nearly identical everywhere, even though every registrar’s interface is laid out a little differently. Sign in to wherever you manage your domain’s DNS settings, look for something called DNS Records, Domain Management, or Name Server Management, and add a new TXT record with these values:
| Field | Value |
|---|---|
| Type | TXT |
| Name / Host / Alias | Leave blank, or enter @ |
| Value / Answer / Destination | The full string copied from Google, including google-site-verification= |
If you’re verifying a subdomain rather than your root domain, enter the subdomain portion in the Name/Host field instead of leaving it blank. For example, verifying support.yourcompany.com means entering support in that field, not the full subdomain.
Registrar-Specific Notes
Google maintains detailed instructions for several major registrars, and while the core steps are the same everywhere, a few have their own quirks worth knowing:
- GoDaddy: DNS settings live under your domain’s management page, look for “DNS Records” or “Manage DNS.”
- Namecheap: Found under Domain List, then Manage, then the Advanced DNS tab.
- Squarespace: Domain DNS settings are managed within your Squarespace account’s domain section, this applies whether you’re on a legacy Google Domains account (now migrated) or a domain purchased directly through Squarespace.
- Hostinger: Under hPanel, Domains, then DNS Zone Editor.
- Cloudflare: Under the DNS tab for your selected domain, make sure the record’s proxy status is set to “DNS only,” not proxied, or verification can fail.
If your domain is registered through Porkbun specifically, our dedicated Porkbun verification walkthrough covers that exact interface in more depth, including Porkbun’s one-click Quick Setup option for MX and SPF records.
Does the TTL Setting Matter?
You might see a TTL (Time To Live) field when adding your TXT record, and some walkthroughs instruct you to set it to a specific number. Here’s the honest answer: Google doesn’t require any particular TTL value for verification to work. TTL controls how long other servers cache the record before checking for updates again, a lower TTL just means changes propagate faster across the internet, while your registrar’s default value works perfectly fine for verification purposes. If a guide tells you a specific TTL number is required, treat that as a suggestion for faster propagation, not a hard requirement.
Step 3: Confirm Verification in the Google Admin Console
Once your TXT record is saved and you’ve given it a few minutes, head back to the same Google Workspace setup window from Step 1, staying logged into the same account matters here. Click Come back here and confirm, then Confirm. Google checks whether it can find your TXT record associated with the correct domain.
If it finds it, you’re done, click Activate Gmail to continue setup. If it can’t find the record yet, you’ll see a message saying verification failed, which usually just means it needs more time, not that something is broken.
Important: keep the TXT record in place until Google actually confirms verification succeeded. Removing it early, even if you’re confident it’s correct, will cause the check to fail, since Google needs to find it actively present at the moment it looks.
How Long Does Verification Actually Take?
Google’s official documentation states up to 72 hours, and that’s a real ceiling worth planning around if you’re on a tight timeline. In practice, most verifications complete considerably faster, often within minutes once DNS propagation catches up, sometimes the confirmation screen shows a countdown of just a few minutes remaining.
The variability comes down to your specific registrar and how quickly its DNS changes propagate across the broader internet. If it’s been more than a few hours with no success, that’s a reasonable point to start troubleshooting rather than just waiting longer.
Does Google Workspace Include the Domain Itself?
This is a genuinely different question from verification, worth its own clear answer: no, verifying a domain and owning one are two separate things. Verification proves you already own a domain, it doesn’t grant you one. If you don’t have a domain yet, you’ll need to register one through a registrar first (GoDaddy, Namecheap, Squarespace, and others all sell domains), and some Google Workspace signup flows let you purchase a domain as part of the process, but that’s a separate purchase from your Workspace subscription itself.
Domain Verification vs. Search Console Verification
This mix-up happens constantly because both processes use a TXT record and both live inside Google’s ecosystem. They are not the same thing, and completing one doesn’t complete the other.
Google Workspace domain verification proves you own the domain so Google can activate Gmail and the rest of Workspace on it. Google Search Console verification proves ownership for a completely unrelated purpose, tracking your website’s search performance and indexing status.
If you’re trying to get your business email working and you land on Search Console instructions instead, you’re in the wrong tool entirely, even though the TXT record mechanism looks nearly identical on the surface.
What to Do If Verification Fails
Google’s own troubleshooting guidance boils down to three checks, worth working through in order:
Double-check exactly what you entered. Compare the value in your DNS settings character by character against what Google originally provided. A missing character, an extra space, or a truncated copy-paste are the most common causes of failure.
Give it more time. Since propagation genuinely can take up to 72 hours in rare cases, if it’s only been a few minutes, waiting longer before troubleshooting further is often all that’s needed.
Contact your registrar’s support. If the record looks correct and enough time has passed, your registrar can confirm whether the record is actually publishing correctly on their end, sometimes an interface issue prevents a record from saving the way it appears to.
Common Mistakes During Domain Verification
Copying only part of the TXT value. The full string, including the google-site-verification= prefix, needs to be copied exactly. A partial copy looks plausible but won’t match what Google is checking for.
Removing the TXT record before verification completes. This guarantees a failed check, since Google needs to find the record actively present at the moment it looks, not evidence that it was once there.
Confusing this process with buying a domain. Verification only works on a domain you already control. If you’re being asked to verify a domain and you don’t actually own one yet, you need to register it first.
Mixing up Workspace verification with Search Console verification. These serve entirely different Google products, even though the TXT record method looks the same on the surface.
Adding the record to the wrong subdomain field. If you’re verifying support.yourcompany.com but leave the Name/Host field blank instead of entering support, the verification will target the wrong part of your domain.
When to Get Help Instead of Doing This Yourself
For most people, this process is genuinely straightforward, and the steps above should get you through it without much trouble. But if you’re managing verification across several domains at once, or you’re not confident navigating your registrar’s DNS interface, getting it wrong doesn’t just delay email, it can leave your domain in a confusing half-configured state that’s harder to untangle later.
Google Workspace Resellers handles domain verification and full Google Workspace setup as part of onboarding, so a real person manages the TXT record, MX records, and everything else rather than leaving you to troubleshoot alone.
Google Workspace Pricing Comparison
Since you’re setting up a domain for Google Workspace anyway, it’s worth checking whether you’re paying the right price for the subscription itself:
| Plan | Google Direct (flexible) | Reseller Price |
|---|---|---|
| Business Starter, below 300 users | $8.40/user/mo | $3/user/mo |
| Business Starter, 300+ users | $8.40/user/mo | $2.50/user/mo |
| Business Standard | $16.80/user/mo | $13/user/mo |
| Business Plus | $26.40/user/mo | $20/user/mo |
Same Gmail, same Drive, same Admin console, at a meaningfully lower price. See the full Google Workspace pricing breakdown for every tier.
Honest Limitation
This guide reflects Google’s current published verification process and general DNS practices across major registrars, but every registrar’s interface changes over time, and yours may look slightly different from the general instructions above by the time you read this. If a specific step doesn’t match what you’re seeing, your registrar’s own current support documentation is the most reliable fallback, alongside Google’s own troubleshooting steps.
FAQs
How do I verify my domain for Google Workspace?
Copy the unique TXT record value from the Google Admin console, add it as a TXT record in your domain’s DNS settings (Name/Host left blank or as @), then return to Google Workspace and click Confirm to complete verification.
How long does it take to verify a domain for Google Workspace?
Google states up to 72 hours, but most verifications complete much faster, often within minutes to a few hours. If it’s taking longer than a few hours, double-check that you copied the full TXT value correctly.
Do I need to keep the TXT record after verification?
No, but not before. The record must remain in place until Google confirms verification succeeded. Removing it too early will cause the check to fail. Once verified, it can be safely deleted.
Does verifying a domain mean Google Workspace includes that domain?
No. Verification only proves you already own a domain. It doesn’t grant or include domain registration. If you don’t have a domain yet, you’ll need to register one through a registrar separately.
Is domain verification the same as Google Search Console verification?
No. Both use a TXT record, but they serve entirely different purposes. Workspace verification activates Gmail and Workspace apps on your domain. Search Console verification tracks your website’s search performance.
What TTL should I use for the verification TXT record?
Any value works, Google doesn’t require a specific TTL for verification. A lower TTL simply means the change propagates faster across the internet; your registrar’s default setting is fine to leave as is.
Conclusion
Verifying a domain for Google Workspace is a genuinely simple three-step process once you know what to expect: copy the TXT value exactly, add it to your DNS settings without removing it prematurely, and confirm back in Google Workspace. The registrar you use barely changes the process, the interface labels differ, but the underlying steps stay the same everywhere.
If verification is taking longer than expected, patience usually resolves it faster than troubleshooting does, Google’s 72-hour window is a ceiling, not a typical wait. And if managing DNS records isn’t something you want to deal with directly, an authorized Google Workspace reseller can handle the entire setup for you, correctly, the first time.